Friday, February 1, 2019

Who Doesn’ Like a Donut?

I bought a donut pan at least 2 years ago.  I have never used it, I don’t really even eat donuts.  The idea of yeast, time and bother just seemed too much.  But with my 2 Little’s coming over for the day and temperatures below freezing - we needed a plan.  I gave these girlies the job from start to finish.  They were unbelievable and the donuts were absolutely delicious!
My search for a recipe required no yeast, no frying.  There were a lot but I decided to go with a recipe from King Arthur Flour.
  • 1/4 cup (4 tablespoons) butter
  • 1/4 cup vegetable oil
  • 1/2 cup granulated sugar
  • 1/3 cup brown sugar
  • 2 large eggs
  • 1 1/2 teaspoons baking powder
  • 1/4 teaspoon baking soda
  • 1/2 to 1 teaspoon ground nutmeg, to taste
  • 3/4 teaspoon salt
  • 1 teaspoon vanilla extract
  • 2 2/3 cups King Arthur Unbleached All-Purpose Flour
  • 1 cup of milk  - I used skim

  • I made a few changes - used cinnamon instead of nutmeg and since I was out of vanilla, I used lemon, which I definitely recommend. 
  • The donuts were light, fluffy and delicious!  We dusted with powdered sugar and also glazed a few. (Just mix powdered sugar and milk) or make a lemon glaze bu adding a drop of lemon extract.  Don’t use flavor - it tastes fake! 
  • INSTRUCTIONS

    1. Preheat the oven to 425°F. Lightly grease two standard doughnut pans.
    2. In a medium-sized mixing bowl, beat together the butter, vegetable oil, and sugars until smooth.
    3. Add the eggs, beating to combine.
    4. Stir in the baking powder, baking soda, nutmeg, salt, and vanilla.
    5. Stir the flour into the butter mixture alternately with the milk, beginning and ending with the flour and making sure everything is thoroughly combined. The batter will be fairly thick; when you draw your spatula through the batter, it will leave a furrow. 
    6. Spoon the batter into the lightly greased doughnut pans, filling the wells to about 1/4" shy of the rim.

    7. Bake the doughnuts for 10 minutes. Remove them from the oven, and wait 5 to 7 minutes before turning them out of the pans onto a rack. 
    8. For cinnamon doughnuts, shake warm doughnuts in a plastic bag with about 1/4 to 1/3 cup cinnamon-sugar. For sugar-coated doughnuts, shake doughnuts in a plastic bag with about 1/2 cup non-melting topping sugar (for best results), or confectioners' sugar.
    9. I will also say check the donuts BEFORE 10 min.   I took them out around 9 min

      If you have a moment, please visit my Etsy Shop - lots of new items especially for Valentines Day! Welldressedcupcake Etsy Shop

Friday, September 21, 2018

Are Brookies Brownies or Cookies?

Autumn is here which means I will start baking again.  This summer was too busy and just too hot for baking. Birthdays in my family have started up again and this year's request was for a Brookie.  Translation = Brownie and Cookie.  My family is divided on this.  Most love the brownies and love the chocolate chip cookies and want them separate. I'm not sure.  One big question.  What goes in the pan first - the brownie or the cookie dough.  I have made them 3x.  2 successes and 1 epic failure.  My advice - brownie goes 1st in the pan, cookie dough on top.  The brownie cooks more evenly.  Also you must use parchment paper.  Your life will be much easier!  so give these a try and let me know what you think!  This brownie recipe is the best I have ever had.  Make sure you don't overbake.

Brownie 
Line an 8x8 pan with parchment paper
Oven at 350 degrees
Melt 4 oz of unsweetened chocolate and 1 stick of unsalted butter together and then cool
1 1/4 c of sugar in a bowl and pour in the chocolate mixture, mix till well blended
Add 1/2 tsp of vanilla extract and mix
Add 3 eggs (room temp) one at a time and blend together
Add 3/4 cup of flour and finish blending.  Make sure you mix in any flour at the bottom of the bowl
Spread in the pan

Now Using  your favorite chocolate cookie recipe  - I use Toll House on the back of the package of chips - try and substitute the dark chocolate chips!!! delicious!
 add the cookie dough on top.  Its not easy to spread but this will be fine once in the oven for about 20-25 min.  you need to check.  The cookie party will be lightly browned.
Last step  - Enjoy
Oh and by the time I remembered to take the picture, they were all gone!


Please stop by and visit my Etsy Shop - WellDressedCupcakes.  I've been busy adding new fall items, vintage Halloween Cupcake Wrappers and garlands.

Friday, December 1, 2017

Break out the Cookie Gun

Break out the Cookie Gun     

This Wear-Ever Cookie Gun comes complete with 9 shapes and 3 pastry tips in its original box from about sometime in the  fifties. I love it!  Why a favorite?  It's from one of the most important people in my life.  My Auntie Sweetie.  Auntie Sweetie is 94 years young, the best aunt anyone could ever have and my only aunt.  I know my love of baking comes from her.  She recently moved and I was given all her baking items.  Cookie cutters, wooden rolling pins, cookbooks, pans and a cookie gun.  Let's start with an easy recipe. D

 I've also added some cute gift tags for your homemade cookies, cakes and handmade crafts.  These can be customized!  Please visit my Etsy Shop @ WellDressedCupcakes and take a peek.  Mention this blog and I'll refund 10% of your order.  Happy Holidays, Merry Christmas!


Cookie Press Recipe

  • 1.  Beat 1 1/2 cups (3 sticks) unsalted butter & 1 cup sugar till well blended
  • 2.  Add 2 large egg yolks
  • 3. In a separate bowl, Combine 3 3/4 cups sifted all-purpose flour,1/4 teaspoon salt, 1 tablespoon of  Vanilla Extract.  Be particular about your vanilla - There is a difference in flavor! 
  •        4.  Add the dry mixture to your butter, sugar and eggs and blend well.
  •         5.  Fill the cookie press with the dough, and turn out cookies 1 to 2 inches apart onto an unbuttered baking sheet. Sprinkle cookies with colored sanding sugars or you can make a glaze to decorate after the cookies have cooled
  • Bake until the cookies are lightly browned, 7 to 10 minutes.
  • ****************************************************************************


Thursday, February 9, 2017

Homemade Biscuits - Simple and Delicious

It's heading down to 17 degrees. A pot of stew is simmering and the perfect finishing touch - homemade biscuits are in the oven.  Even if you don't consider yourself a baker - biscuits are easy, have few ingredients and are delicious.  Flour, salt, baking powder, milk and butter.  That's it! And even when you make a mistake (as I did) they are still good.

So here goes:
Preheat oven to 450 degrees F (230 degrees C).
In a large mixing bowl sift together 2 cups of  flour, 1 tbs baking powder and 1/2 tsp salt. 
Cut in shortening (I always use butter 1/2 cup or 8 tbs) with fork or pastry blender until mixture resembles coarse crumbs.
Pour 3/4 c of milk into flour mixture while stirring with a fork. Mix in milk until dough is soft, moist and pulls away from the side of the bowl.
Turn dough out onto a lightly floured surface and toss with flour until no longer sticky. Roll dough out into a 1/2 inch thick sheet and cut with a floured biscuit or cookie cutter. Press together unused dough and repeat rolling and cutting procedure.
Place biscuits on ungreased baking sheets and bake in preheated oven until golden brown, about 10 minutes.
I got involved in another project and left them in the oven a bit too long - but they were so good!  Very flaky on the outside and perfect on the inside. 
Serve plain or sliced with butter.  Yum!!!

Let me know if you make these and if you have a chance visit my new shop 
Http://welldressedcupcakes.com
Or
Http://welldressedcupcakes.etsy.com


Thursday, February 2, 2017

Valentine's Day = LOVE

I have always loved Valentines Day.  In our world today, we need a day of love, hearts & kindness. Just a day to be nice!
Hearts - anything hearts are my favorite. So here are a few of my favorite items on my Etsy - Well Dressed  Cupcakes
For those who like to make their own items - Digital Downloads are so easy.  Just print as many as you need of these adorable conversation Heart saying Flags.  Printed on a vintage look of pinks and white wood.


As I said anything with a heart -This little cake banner with hearts is perfect for your cupcakes and cakes.


Love Birds in all heart patterns are a perfect addition for your little cakes


Mason Jar Gift Tags with hearts - customized colors


For your traveler - Map Cupcake Toppers

Pretty Cupcake Pinwheels in pink and red with tiny heart brads


Larger Hearts with LOVE in cherry red are perfect for cupcakes, write on the back of each and use as a placecard or fill a tiny vase with these for your table decor! Or Handstamped LOVE On red & white Hearts.


Hearts in all colors - Navy, Sage Green, Pink, Pearl White or pretty much any color you need are available. 


Hand punched Confetti - all colors for your table, in a Valentines Day Card or fill up a pretty bowl.


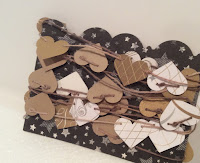
Garlands of course with hearts - all sizes and lengths arriving to you in a mini envelope. Vintage garlands, Blue Garlands and Red Mini Garlands!


Cupcake wrappers for your Valentine Treats, available in mini and standard sizes. Already assembled. In pink, Red and White
Just bake and drop into decorate. 


You can find all these pretty items in my shop 
Mention this Blog and I'll discount 10% after purchase.
Happy Valentines Day!
Http://welldressedcupcakes.etsy.com